
New article
Recently updated
Risk Records - Associated Entities

Audience: Risk Administrators, Risk Managers and Risk Users
On selecting a row in the Risks List, the screen form area by default displays the details of a Risk on a screen form with title Risk: _____ where _____ is the Name of the Risk. Above that Risk Details screen form, a set of active tabs are displayed as shown here:

The Risk Details tab is the default. The remaining eight (8) tabs are entry points to functionality related to items associated with the selected Risk. This is where assessments are made, workflows are managed and additional information and documentation is attached to the Risk.
Journals
Select this tab to list and optionally create additional Journals (i.e. informative notes) to be retained with this Risk.
Note: No Journals are created automatically.
To create a new Journal:
- Select the New Entry active icon, to display the form below.
![]()
- Complete the form
- Select the Save icon to confirm
- To associate a Document with the Journal, tick the checkbox, enter a local title, and enter the file name and path or browse for the Document file, select save
Workflow
If the Risk Type of the Risk requires that a Workflow is completed (by the Assess tick box being ticked), OR it is optionally chosen a Workflow is executed, selecting this tab will display a drop down box labelled Assessment. Select from the drop list (which is a list of the already set up Workflow templates) the required workflow. You will see the workflow and its actions displayed as below. To change the sequence of Actions, use the up/down arrow icons.
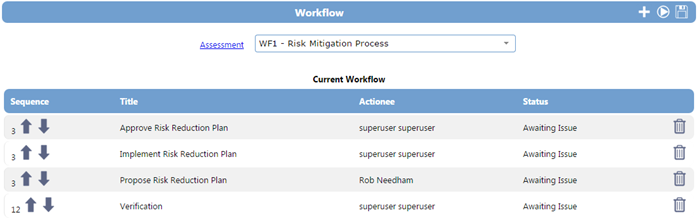
To “kick off” the Workflow:
- Select the Kick Off Workflow icon. This will send an email to the first Actionee and place an Action item in the Actionee’s EQMS To-do list.
To add an Action:
- Select the Add Action icon. This will display an overlaid form as below:

- Select an Actionee from the drop list
- Select in the row of the Action to be added to the Workflow.
To remove an Action:
- Select the delete icon in the relevant row of the action in the workflow tab
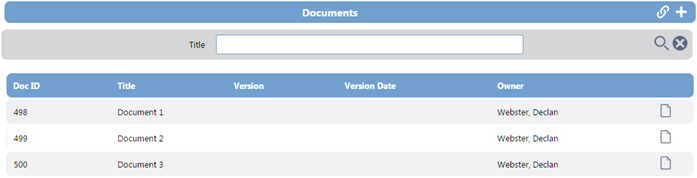
Associating Documents
Navigate to the Documents tab. The Documents list screen will be displayed similar to this:
Network Documents
-
-
-
- To associate a Document with a Risk, select the New Attachment icon. The overlaid New Document screen will be displayed similar to below:
-
-

-
-
-
- Complete the mandatory Title field
- Browse for a file to be uploaded from any accessible computer/folder
- Select the Upload icon to the right in the New Document screen header bar.
-
-
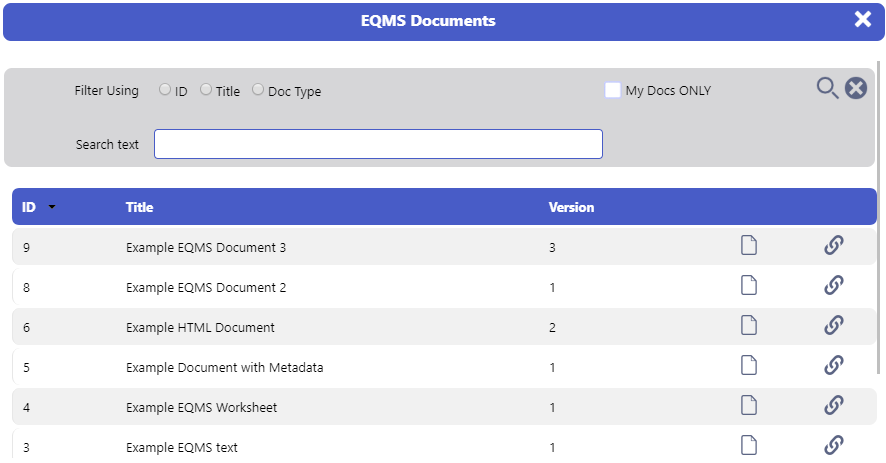
EQMS Documents
-
-
-
- To create a live link to an EQMS Document with a Risk, select the Link EQMS Document icon. The overlaid EQMS Documents search screen will be displayed similar to below:
-
-
-
-
-
- Use the filters to search for the required document
- Select the Link icon to associate the Document.
-
-
Attach EQMS Document
-
-
-
- To attach a copy of an EQMS Document at a point in time with a Risk, select the Attach EQMS Document icon. The overlaid EQMS Document screen will be displayed similar to below:
-
-

-
-
-
- Use the filters to search for the required document
- Select the Link icon to associate the Document.
-
-
Standard
You can associate Standards to your risks, be it ISO or other regulatory standards. When you select the ‘Standards’ link from the risks top bar you will see a screen similar to below. The standards listed on the left-hand side of the screen are drawn from the System Management module within the system.
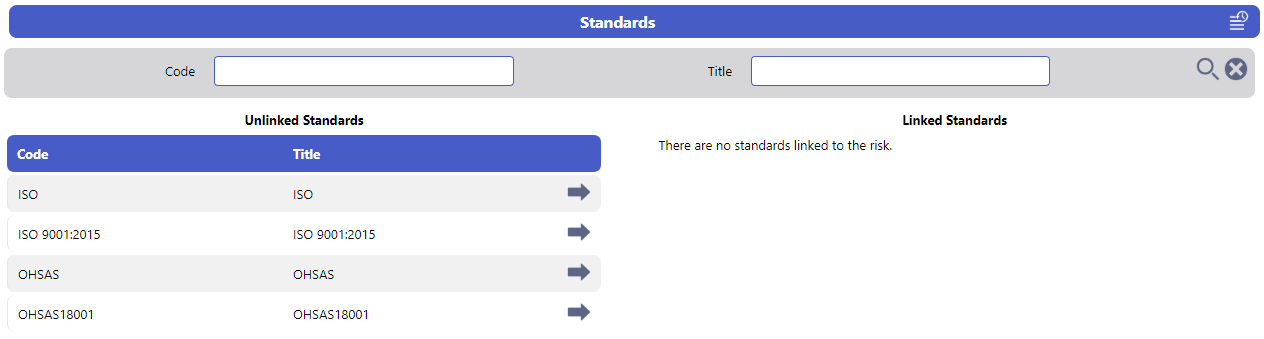
From here it’s as simple as selecting the arrow to the right of the listed standard. It will then appear in the list on the right-hand side of the screen.
To remove this link, simply select the left facing arrow and the associated standard will be removed.
Organisations
You may wish to associate specific organisations within your company with a risk. To do so, select the organisation link from the risks top bar and a screen will be displayed similar to below. The organisations listed on the left-hand side of the screen are drawn from the System Management module.

From here it’s as simple as checking the checkboxes in the relevant rows and then selecting the arrow in the Unlinked Organisational Areas header bar. It will then appear in the list on the right-hand side of the screen.
Note: Organisational Areas appear in their appropriate hierarchy. To reveal sub-areas below, select the expand icon in the relevant row.
To remove this link, check the relevant checkboxes in the list of Linked Organisational Areas and select the arrow in the header.
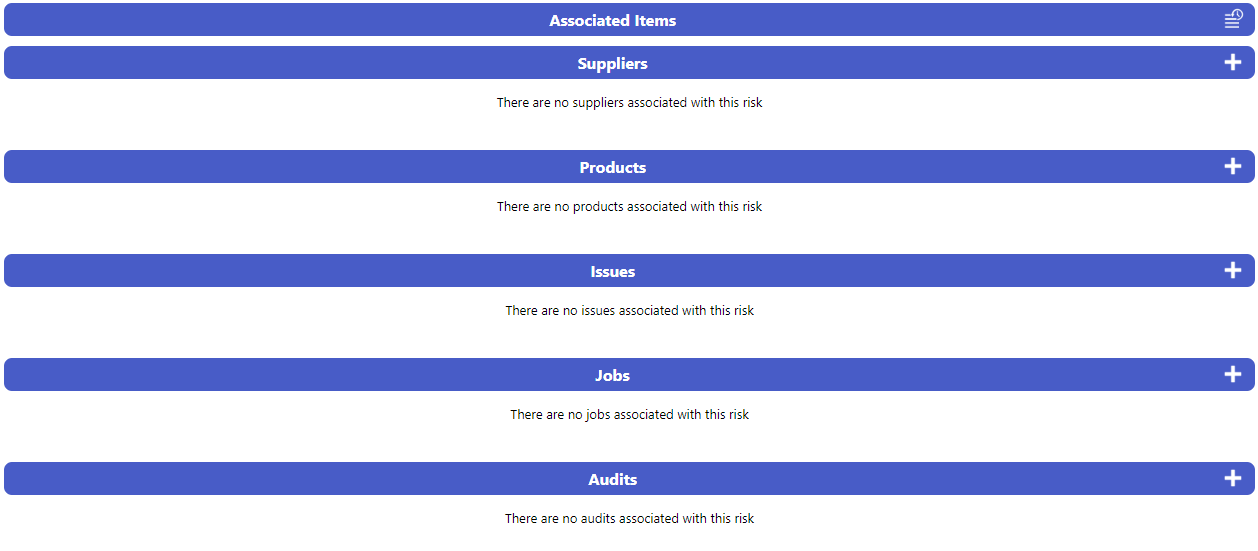
Associated Items
Issues can have other EQMS entities associated with them for reference purposes. The available associated items will depend on which other EQMS Modules you are using
- Display the target Issue Details screen by selecting anywhere in the record row in the Issues list screen.
- Select the Associated Items tab from the top tabs bar. The Associated Items screen will be displayed similar to this:
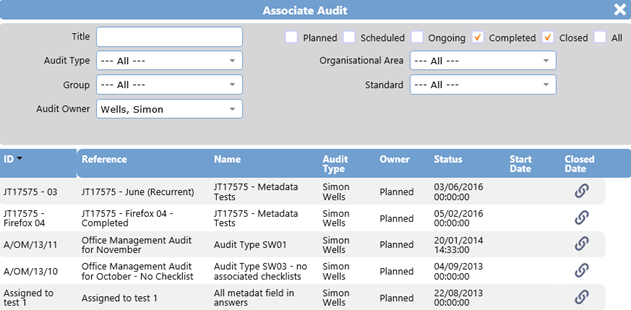
- The association process is the same for all items. Here we will cover the association of an Audit. Select the Associate New icon to the right of the relevant header bar. The Associate Audit screen will be displayed similar to this:
- Choose the Audit you want to associate with the Issue by selecting the Associate Audit icon to the right of the record row. The following system message will be displayed similar to this:
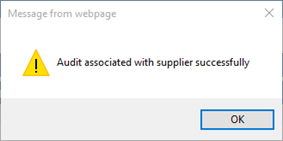
- Select OK to continue.
- To view the detail of the associated Audit, select anywhere in the record row. The Audit Detail screen will be displayed similar to this:
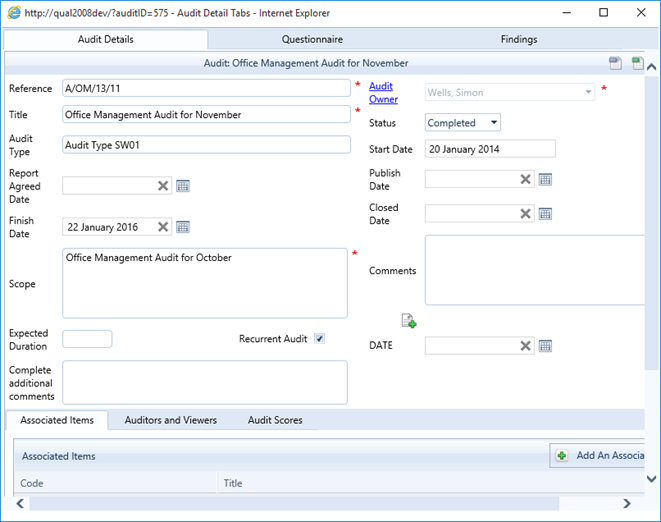
- Use the available tabs to navigate around the Audit Details. Select the Close icon to the right in the overlaid Audit Details screen.
Tags
You may wish to associate other key information (Tags) with a risk. To do so, select the tag from the risks top bar and a screen will be displayed similar to below.

From here it’s as simple as selecting the arrow to the right of the listed tag. It will then appear in the list on the right-hand side of the screen.
To remove this link, simply select the left facing arrow and the associated tag will be removed.